Advanced technical features abound on the GL1000. Even by today’s standards, the bike continues to impress. One simple example: the very positive side-cover latch hardware.
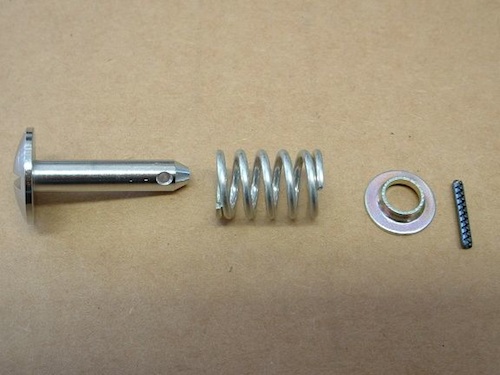 GL1000 Side-Cover Latch Hardware
Because of this great design, lost side-covers are a rarity on GL1000s. Many modern bikes would be improved with this thoughtful system.
Eventually, the latch hardware might need to be removed…typically for paint work or to replace corroded components.
It can be an aggravating proposition and put your side-covers and paint at risk unless you know a couple of tricks that I cover below.
Tools Needed:
- Penetrating Lubricant
- 1/8″ Drift
- Hemostat
- Small Hammer
- Bench Vise
Replacement Parts – 1 of each per Side-Cover:
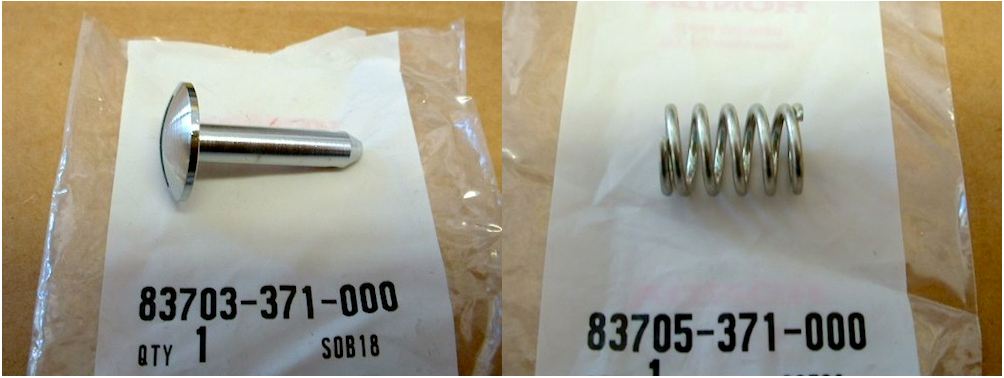
- Latch Pin
- Spring
- Retaining Cup Washer
- Special 2mm Corrugated Roll Pin
Remarkably, these parts are still available from Honda as of this writing.
Latch Pin and Spring
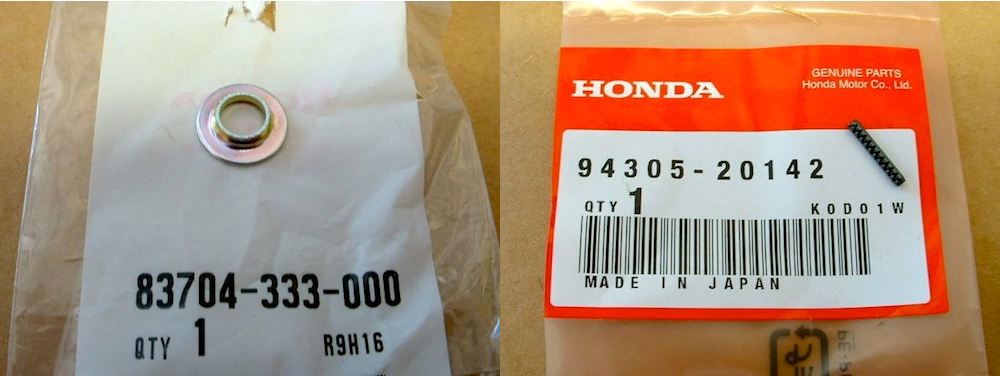 Retaining Cup Washer and Special 2mm Corrugated Roll Pin
Removal / Replacement Steps:
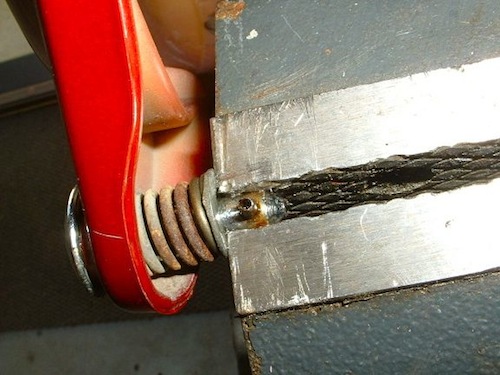
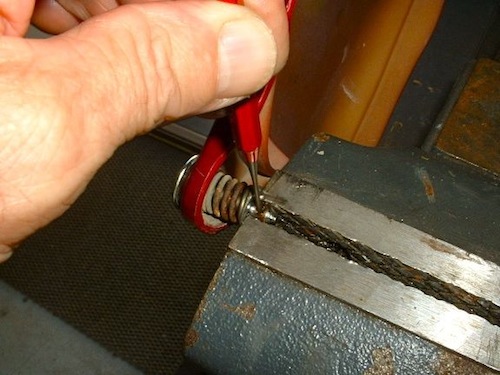
1. Trick #1: My method of clamping the assembled side-cover into the vice is the main tip which makes this an easy task. While depressing the spring slightly, clamp the side-cover latch pin in your bench vice as shown below. Be sure you have relieved side pressure exerted by the cup washer from the roll pin. Rotate the side-cover to a convenient resting spot taking precautions to protect the side-cover’s finish. Apply penetrating lubricant to the old roll pin.
2. Tap the roll pin with a small hammer until it is “flush” with the latch pin.
3. Using an 1/8″ drift, carefully tap the pin out. Important: if you plan to re-use the old pin, take adequate steps to capture it as it exits the latch pin. Typically, they will fly an impressive distance!
4. You can now remove all of the remaining hardware from the side-cover.
5. To re-install the latch hardware, reposition the latch hardware onto the side-cover in the correct orientation, slightly depress the spring and grab the latch pin in the vice with the hole pointing up. Again, rotate the side-cover to a convenient resting spot taking precautions to protect the side-cover’s finish.
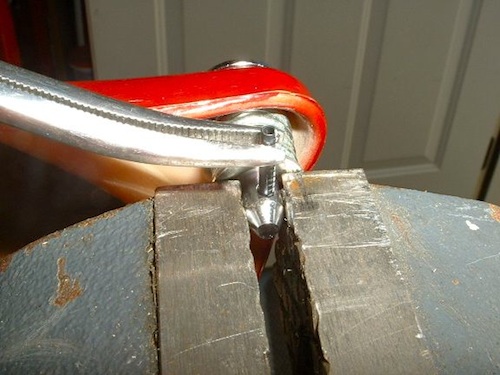
6. Trick #2: Grasp the roll pin in a hemostat tool as shown. If you don’t own a pair of these locking medical clamp tools, now is your excuse. They are incredibly handy. Lubricate the hole, then start the roll pin into the hole with a few light taps with the hammer. Remove the hemostat and finish tapping the roll pin into position taking care that it is centered, Remove the side-cover from the vice.
The side-covers are now ready to install.



my gl 1000 1976 ran fine all summer, but now the 2 and 4 plugs are fowling, they fire when i open it up but start missing when i go back to idal.It has some kind of electronic ignition, dont know how to tell witch one it is but has been out standing so far. the coils are what came with the bike, but in checking the spark it seems to have more spark in 1 and 3 plugs that 2 and 4 do, any ideas? and a have a set of coils and wires off a gl 1100, will they interchange, thanks for any ideas
just a simple question, 1976 gl 1000, with around 48 thousand miles, the oil pressure, cold, and hot, about what should they read? thanks
It depends on the accuracy of your gauge and the oil galley your used to access oil pressure.
Generally, oil pressure on GL1000s (warm) should be about 15 psi at idle and 40-50 psi at 3,000 rpms under load. Cold pressures will be slightly higher.
my gl 1000 1976 ran fine all summer, but now the 2 and 4 plugs are fowling, they fire when i open it up but start missing when i go back to idal.It has some kind of electronic ignition, dont know how to tell witch one it is but has been out standing so far. the coils are what came with the bike, but in checking the spark it seems to have more spark in 1 and 3 plugs that 2 and 4 do, any ideas? and a have a set of coils and wires off a gl 1100, will they interchange, thanks for any ideas