Rebuilding the front forks on a GL1000 is very easy. In fact, the GL1000 is one of the few bikes that permit a fork rebuild without removing the fork tubes from the triple tree! I don’t generally do it that way, but I have.The only difficult part is removing the old fork seals. The Honda workshop manual merely says: “remove the fork seal” with no additional explanation. Obviously, the writer of the manual never attempted this task!
Most mechanics try a variation on the “pry them out” method suggested in other manuals. Trust me, this will frustrate you and risk damage to the slider. Attempts to rig an internal gear puller will also frustrate you and risk damage to the slider.I’ve found only one method that works reliably that won’t damage your sliders.
It requires the fabrication of a very simple tool first suggested by Jerry Boody. Since this information is hard to find, I decided to share the information here. I use a variation of the tool created by Jerry and give him full credit for this clever creation.
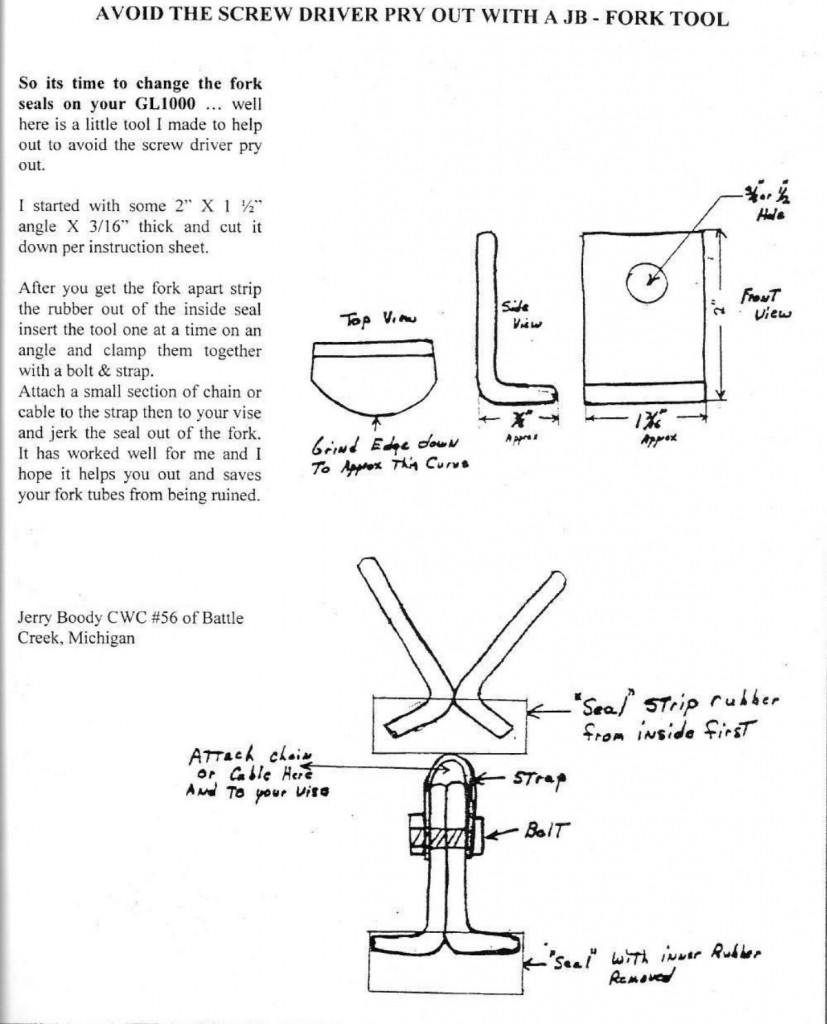
The tool is built in 2 parts as shown below from ordinary 1 1/4″ heavy strap material purchased from any hardware store. The material I selected is 3/16″ thick. I found it easier to build from “strap” material rather than “angle” as Jerry suggested. The actual dimensions aren’t critical so long as it’s sturdy and can be shaped into the configuration shown.
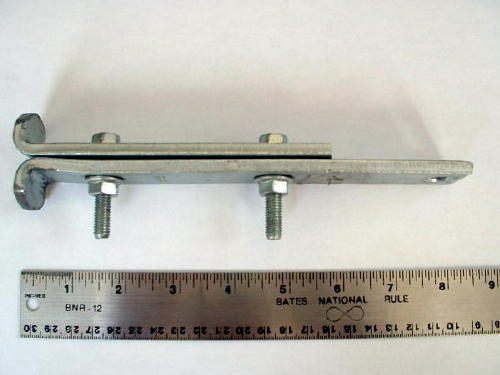
There should be 2 holes in each puller half for securing with sturdy bolts and nuts (I used 8mm hardware). The lower bolt hole should clear the top of the slider by a comfortable margin.
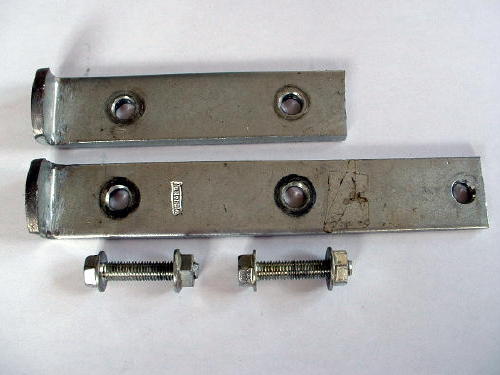
Overal length is about 8″ on the tool I built. The business end of the 2 combined halves is bent and shaped into a circle with a diameter that is just slightly less than the internal slider ID at the point where the seals are installed: approximately 45mm. You’ll need a sturdy vise, a heavy mallet and a bench grinder to get the desired shape. The ID of the fork tube where the seal installs is 48mm. This 3mm difference betwen puller and slider is critical! If the dimater of the circular portion is too large, you might damage the slider…too small and it might not get enough “grip.”
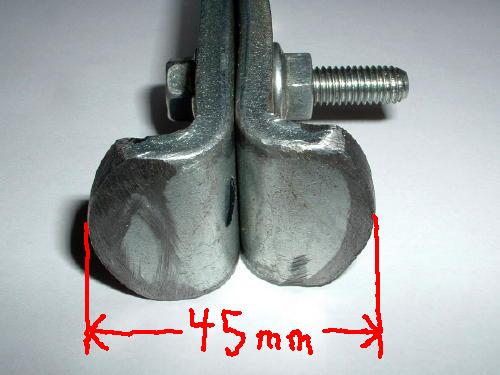
Jerry’s original design called for a short section of strong chain connecting the puller to a vise. This would allow the seal to be “jerked” out.
After trying it this way a few times, I ditched the chain and clamped the puller in my vise. This allows you to use the considerable length of the slider to “lever” the seal out under total control.
Using the Puller:
Remove the forks sliders from the fork tubes (consult your manual)
Clamp a fork slider in a soft vise and remove the dust seal (pops out easily with a flat-bladed screwdriver)
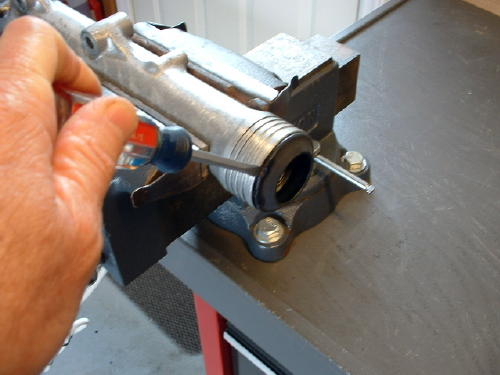
Remove the retainer clip. Note the gouges and scars from prior fork seal replacement efforts! We won’t be so careless this time.
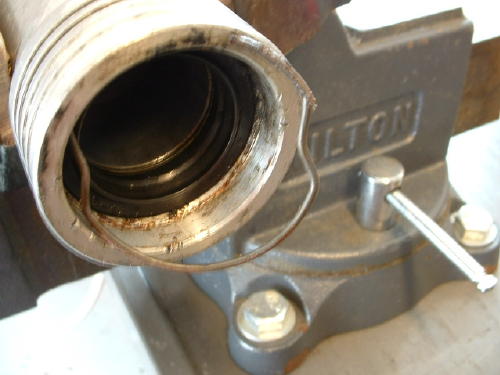
The 2 unbolted tool halves are inserted indivdually into the seal area so that the radiused edge of the “puller” engages the internal metal lip architecture of the fork seal.
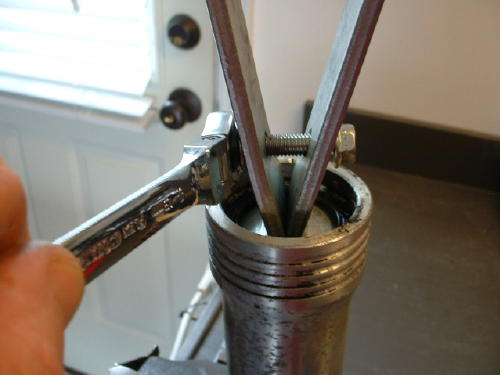
The 2 halves of the tool are then bolted together. You will need to gradually tighten the lower bolt first, then the upper in several passes.
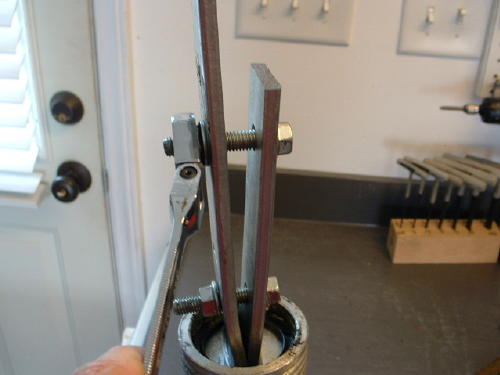
As the 2 bolts are tightened, the puller gets a death grip on the seal.
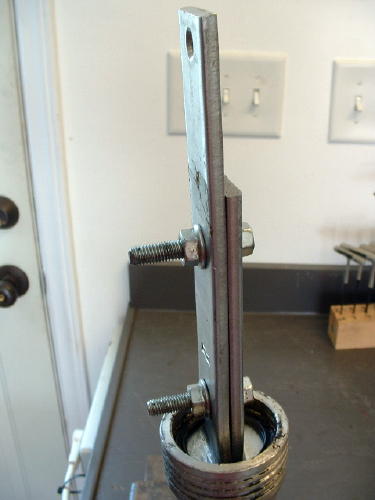
Reposition the slider as shown…gripping the end of the puller in the vise.
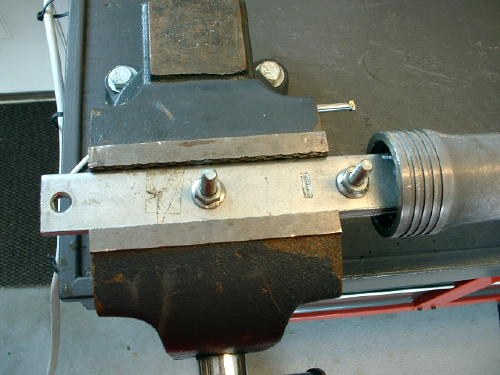
Now you will be able to exert the force necessary to remove the seal without damage.
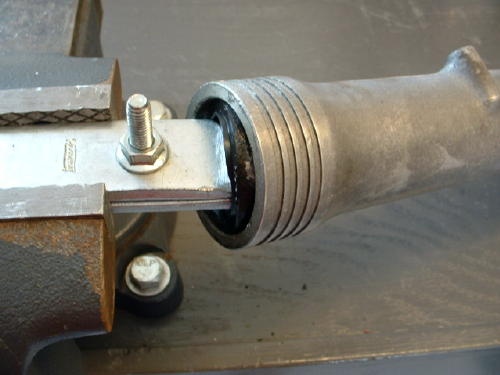
They pop out like butter!
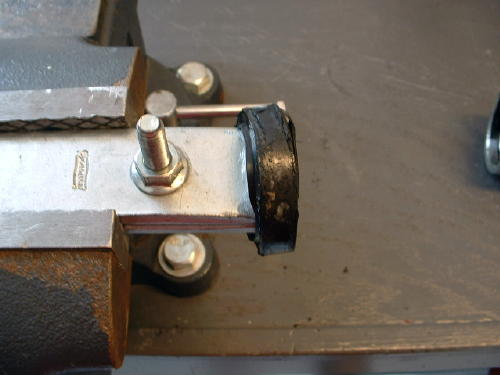
Repeat for the other slider.
Reassembly tips:
1. Use new Honda seals. There have been many updates to the OEM seals. I’ve had poor results with aftermarket seals.
2. Get the latest and freshest stock you can buy.
3. New design Honda seals omit the separate “wiper” seal found on the earliest bikes. Since these were early forks, I found a wiper seal which is easily removed as a separate step…no puller needed.
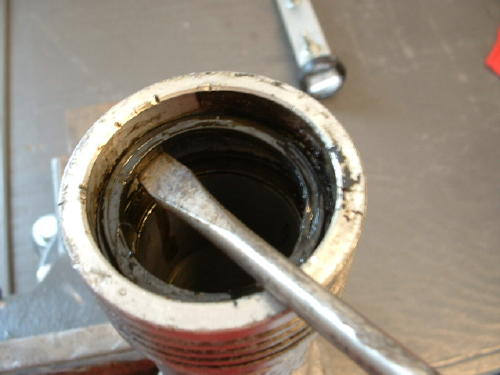
4. Don’t forget the back-up ring:
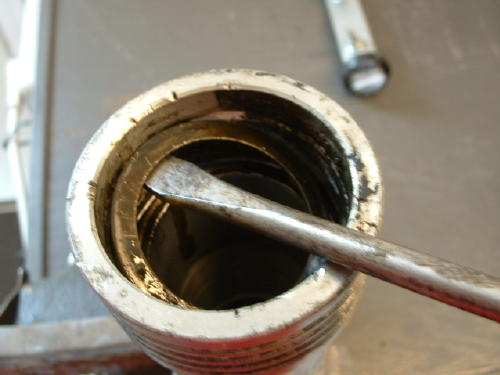
5. Ready for cleaning and rebuild.
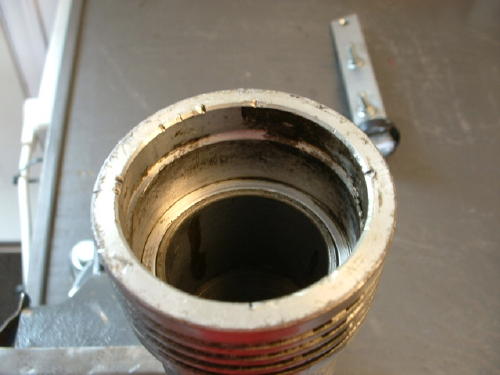
6. This is the point were I would sent the sliders out for polishing. Remember to clean very carefully with strong detergent after polishing to remove all traces of polishing compound. Remnants of these materials will quickly destroy new seals!
7. Make sure your fork tubes are clean and free of any nicks, burrs or pits before you re-mate the sliders. Problems of this nature are the cause of most premature fork seal failures.
Highly recommended and thanks again to Jerry Boody!
Ok. So I understand the break down process for the forks but I’m not sure about the rebuild process. This will be the first time I’ve rebuilt forks but I’m confident in my abilities to follow some instructions. I haven’t ordered the seals or started the process to tear them down yet, I want to make sure I get all the information before I proceed.
My 1976 GL1000 has the wiper seal beneath the oil seal, and then of course the backup ring. I have obtained the latest replacement oil seals (part #51495-467-405). These seals look identical to the ones I just removed, they also measure the same. A new backup ring came with the oil seals as well, but there is no wiper seal included. Given that the new seals appear to be the same as the old seals but without the wiper seal, can I just pop in the new backup rings and place the new oil seals (without any wiper seal) on top of the backup ring?
So far, it looks like the old wiper seals could be re-used. Should I put them back in so the seals are just like the originals, or should I omit the old wiper seals because the new oil seals are designed to function without them? Even though the oil seals look exactly the same as the old oil seals.
Tom,
With the new style seal the wiper ring is not necessary to install or replace. We suggest a real well soaking and cleaning of all components before assembly.
Thank you for your inquiry,
Norton
Randakk’s Customer Service Team
http://www.Randakks.com
How do I know what fork seals to order, my old ones are 10mm and have the wiper seals and washer. I assume I need somewhere around 12mm but I’m seeing several Honda part numbers. How do I know what is the correct one?
The ones you need are the only ones currently available from Honda. Regardless of what part number you request, it will supercede to the current design.
Can fork springs be replaced without removing the forks from the bike? I would like to install springs from Progressive Suspension.
Also, on top of the forks are caps with what looks like air nipples. Don’t look factory. What can you say about that?
GL1000’s were not equipped with air Schraeder valves.
Yes. Springs are easily replaced without removing forks.
Dood. Wish I’d seen this before struggling with the first one. Most. Difficult. To. Remove. Fork. Seal. EVER.
Until now. I believe I have some of the correct size strap in the shop…
This will come in handy, as there is more than one Old Wing in Taos.
I got a pice of wiper ring with the tool when I was extracting the seal. This seal, from a bike last ran in 1985, was cemented in place. Can I ignore the wiper ring when replacing the seal?
No. You cannot ignore. All remnants of the old seal must be removed.
Sorry, I will clean all the old seal material. The concern was that I damaged the wiper seal during extraction of the main seal. You mentioned that the wiper ring was installed on only the older models. Can I eliminate the wiper ring when doing the rebuild or do I need to source one?
Yes. There is no need to replace that superseded “wiper” design. Good thing – they are unavailable.
I have a air kit on the top of my forks and want to eliminate it and use the original fork caps, but cant seem to find them,the o-rings and the black rubber covers. Any idea as to where I can get these? Trying to do a 100% original restoration on a ’76 LTD. Thanks,Jeff
Jeff:
Try the vendor sources listed here: http://www.randakksblog.com/links/
Good luck on your project.
The fork caps have to come off before any work on the forks. How do you remove them when they don’t want to come out (won’t turn) and the hex openings are stripped out?
Once the caps are damaged like that you have to go “heroic.” Best way I’ve found is to support the bike with tie-down straps from above …important for safety! Then, loosen the upper and lower triple tree clamps. That will allow you to move the fork tubes up about an inch relative to the clamps. Now you can grab the rim edge of the caps with Vice-Grip pliers taking care not to bite into the fork tubes. Obviously, the caps will now be ruined totally and must be replaced.
Is it possible to change the fork seal without removing the cap?
Theoretically “maybe,” but the practical answer is no. The caps must be removed to remove the springs, remove the retainer bolt and gain full access to the seals.
I am powder coating my sliders. I feel silly, but I see now that the coil springs for the front have tighter coils on one end than the other, not a lot, but somewhat. I foolishly did not notice this when I took them apart. Anyone know which way they go back in? I assume the tighter coils go to the top, but an mot 100% sure, and I do not like changing something an engineer did unless I have good reason to, and here I clearly do not.
Thanks!
Tom
Per the Honda Workshop Manual, page 13-9:
“The tightly wound portion of the spring must be positioned toward the top of the fork.”
Hope this helps.
It looks like the images aren’t loading correctly here. I’m only able to see the first one.
Yes. These images will be fixed soon (within 24 hours I hope). Randakk
Images fixed now! Randakk