World’s Best GL1200 Kit!
This kit is proprietary to Randakks…you won’t find this available anywhere else at any price.
This high-value kit has been created using the same philosophy as Randakk’s industry-leading GL1000 and GL1100 Master Carb Overhaul Kits.
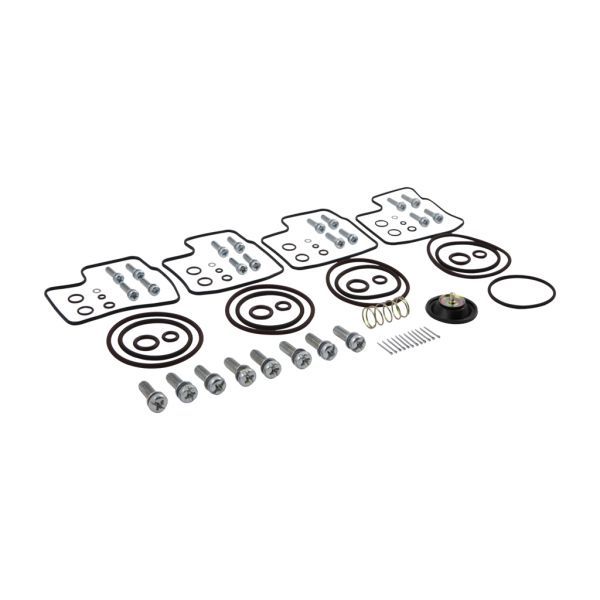
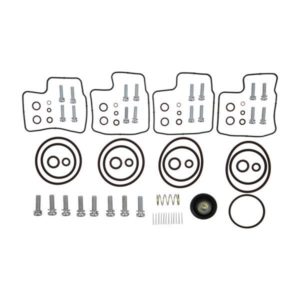
Each kit provides everything listed for all 4 carbs + other items required for splitting and rejoining the carbs to the plenum as well as the air cutoff valve rebuild kit!
Only the highest quality items are included. The components in this kit have been thoroughly tested for fit and function – and represents the best value available in the market.
Trust us, you will need everything in this kit to do a proper overhaul of your carbs.
GL1200 Model Identification
- All 1984 – 1987 GL1200 with original carbs will require our 100-1230 kit.
Obviously, this kit will NOT service fuel-injected models.
Kit Components
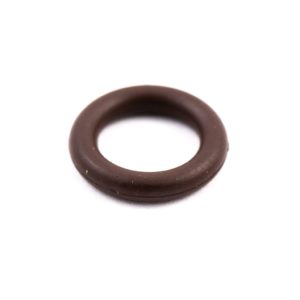
Viton O-rings:
4x Fuel (idle) mixture screw (2.8 x 1.1 mm)
4x Float bowl drain screw (4.3 x 1.3 mm)
4x Large carb-to-plenum (air) O-ring (48.8 x 2.6 mm)
4x Intake manifold (35.5 x 2.6 mm)
4x Main Fuel Tube (5.8 x 2.0 mm)
4x Air-Cut Tube (6.9 x 1.3 mm)
4x Vent Tube (6.9 x 1.3 mm)
4x Anti-afterburn coupling pipe seals (9.8 x 2.4 mm) – (for models with secondary air supply system)
1x Special O-ring for models with secondary air supply system (goes under anti-afterburn valve – supplied in all kits…35.0 x 2.1 mm) – (supplied in all kits but not used on all models)
Gaskets:
4x Fiber-reinforced float bowl gasket – (Constructed of superior Viton material to resist the components of modern gasoline.)
1x Randakk’s exclusive improved Viton GL1100 plenum gasket
Miscellaneous Parts:
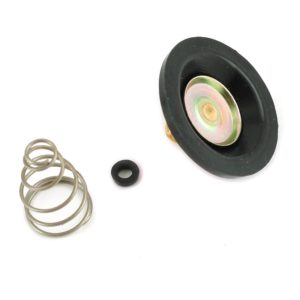
1x Air Cutoff Valve Overhaul Kit – (“slow air cutoff”)
12x 1 mm cotter pins for linkage – (simple item, but hard to find elsewhere)
8x Special screws and lock washers rejoin carbs to the plenums (6 x 20 mm)
4x Idle mixture screw washers
16x Float bowl screws (4 x 16 mm)
Parts Total: 79 total pieces
All O-rings Are Not The Same!
The round o-rings in each Master Kit are made of Viton rather than ordinary nitrile (Buna-N) as found in other aftermarket carb kits. One good case of severe engine overheating can ruin the carb o-rings found in ordinary kits? Randakk’s o-rings are the best available!
Viton is superior to nitrile in terms of:
- Heat tolerance (400 degrees F vs. 250 degrees F)
- Compression set
- Permeation
We even include rebuild kits for the air cut-off valves as required for each application.
Recommendation
You will need access to good reference material for a successful rebuild, such as the official Honda Factory Workshop Manual.
There is some critical information there on rejoining and aligning the carb bodies to prevent binding of the throttle and choke shafts…very important!
We highly recommend pairing this kit with the GL1200 Carburetor Repair Guide Booklet, written by GL1200 guru Howard Halasz.
Quick Notes:
Unlike a few kits, there is no stainless hardware.
The diaphragm in this kit is for the air cutoff valve on the bottom of the plenum (also known as the “slow air cutoff”).
Many GL1200 carbs have a second diaphragm on the bottom of the rack. This is the anti-afterburn valve. It is a component in the secondary air supply system – an emission control system used on both 49-state and California models (CA models add an additional evaporative canister). The second diaphragm is not supplied in this kit. They rarely need replacement. If you decide that yours needs replacement, they are still available from Honda – part# 17440-MG9-641.
The separately packaged, single O-ring in the kit (35.0 x 2.1 mm) seals the “reed box” chamber to the carb plenum.
Depending on supplier packaging, the Air Cutoff Valve Overhaul Kit may or may not include a small special seal. It is not used on this model and may be discarded.
No jets or jet needles are supplied with our kits. These can normally be cleaned and reused. “Dress” the jet tower cavities with crocus cloth or similar to remove oxidation and burrs, then use a lubricant like Vaseline to insert the main jets.
No float valve/seat assemblies in our kit.
No fuel filter is included. But it would be a crime to redo your carbs and not take prudent measures to ensure a pure fuel supply!
This kit includes everything you need to separate and rejoin the plenum: plenum gasket, special carb-to-plenum fuel seals (2 sizes), carb-to-plenum “air seals” as well as 5 high-quality screws in the correct lengths. If you don’t split the plenum and renew these critical parts during your overhaul, you may have regrets later.
While you are at it, you should replace your fuel hoses as these can sometimes disintegrate from the inside out and be a source of fuel contamination in the form of small rubber fragments. I recommend that you purchase a length of high-quality 1/4″ fuel injection hose locally. Don’t forget to flush your fuel pump. Debris can collect here as well.
Considerable skill is required to install this high-quality kit correctly. Since Randakk’s cannot control this important variable, there is no warranty on these. Rest assured that they are of the highest quality materials and workmanship. Each kit has been carefully packed and inspected to ensure that all items are included.
Not sure can handle your own rebuild? Then, check out Randakk’s Approved Carb Rebuilder Program.
To read more reviews on this and other products visit our Review Site, https://www.randakksreviews.com



I bought this booklet:
https://www.randakks.com/honda-gl1200-goldwing-carburetor-repair-guide.html
This is a big waist of money! The pictures are total crap and it is not possible to see the details your need for remounting the carbs.
Ed L. Where can I find the float valve/seat assemblies? also, If you have an answer as to how the diaphragm is mounted to the slide, I would like to hear it.
Where should dot on cam be whenever points are open on 1an 2 points
Fred,
Thanks for reaching out.
This tech article of the “split-timing” technique for the GL1000 should help you out.
https://www.randakksblog.com/ignition-quirks-split-timing-technique/
my 84 GL1200 needs a new carburator vacuum chamber diaphram replacement , I have the parts but not the smarts. How are they attached to the slide valve assembly ?