If you’ve watched my GL1000 Carb Rebuild Video, you know that I’m strongly opposed to total immersion chemical carb cleaning methods. The very harsh ingredients in these “buckets of doom” are bad for your carbs, your health and the environment. The lubricating/sealing felts used on the throttle and choke butterfly shafts on GL1000 carbs are particularly vulnerable to such abuse.
Heaven forbid you were to carelessly dunk your GL1100 carbs in one of these buckets. Your air-cutoff valves as well as the accelerator pump would quickly be history if they were left in place. Sadly, GL1100 air cut-off valves and accelerator pumps are frequently ruined by indiscriminate use of carb cleaners (even with no dunking) due to their vulnerable locations.
Here’s an exception to my “no dunk” mandate. This method is advocated by old school mechanics like Howard Halasz and myself: 20 minutes in a slow-boiling pot of distilled water is an excellent cleaning method for vintage Honda carbs (don’t use tap water…it’s not as effective).
This procedure is safe for the carbs, so long as they are completely disassembled and you use a pot with a thick bottom. On early GoldWing carbs, leave the throttle and choke butterflies in place. They are very hard for amateurs to reassemble without introducing binding.
This method is not as effective as professional ultrasonic cleaning, but I like to recommend it to amateur mechanics because it’s hard to do any harm to delicate parts. It might not be all the cleaning you need to do, but this will help you make quick progress in the right direction. It will surely soften lots of crud!
Notes:
-
GL1000 carbs should be done in pairs with the decorative chrome stays left in place. This way you don’t have to disturb the carb-to-carb synchronizer joints or the choke shaft connectors
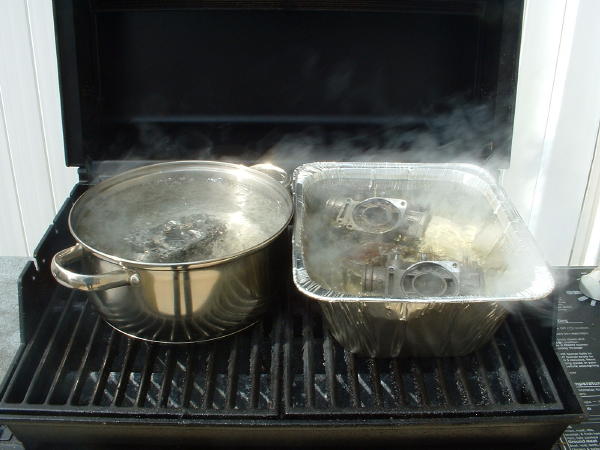
- To avoid the wrath of the sisterhood, you can might consider doing this outdoors on the grill as shown below!
- A 5 quart pot is about right or you can use a disposable aluminum roasting pan as shown below.
-
GL1100, GL1200 and CBX carbs should be done as individual carb bodies.
-
Here’s a good article by Mike Nixon on disassembling CBX carbs.
- After the carbs are removed, let them cool and drain, then dry them carefully with compressed air.
If you decide to do this indoors, get “permission” from your wife before you begin. Otherwise, be prepared for some grief. There will be some residual smell no matter how well you ventilate.
 GL1100 and CBX carb bodies being boiled clean!
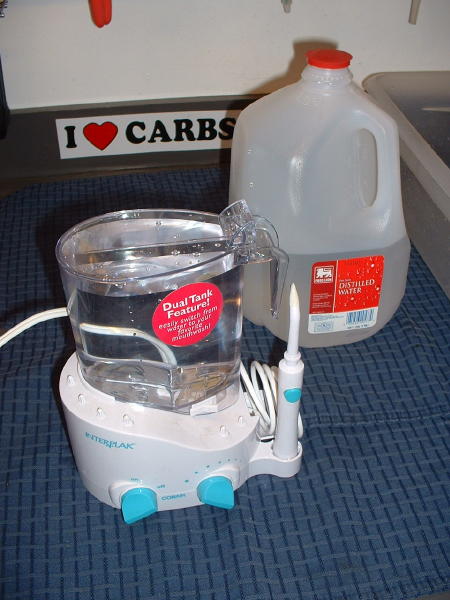
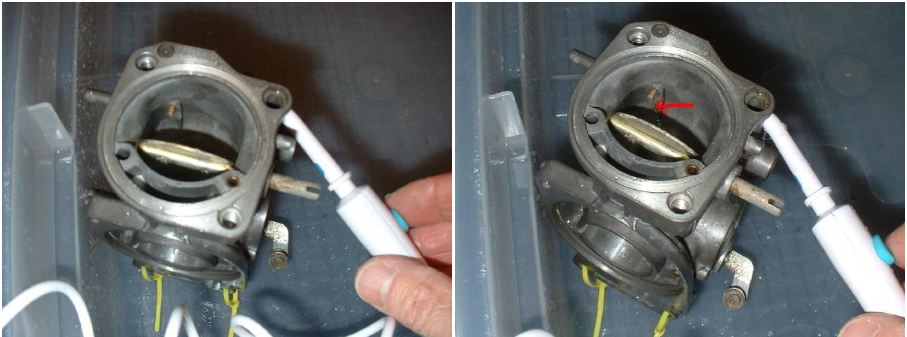
Here’s another method used by Howard and me to verify that the cleaning process had been thorough. An ordinary home dental water pick makes a very effective tool for verifying that all carb passages are clear. You should still blast all circuits with compressed air. This step just helps verify that you’ve successfully cleared all the passages as the pulsating water stream gives easy visual verification of clear fuel and air circuits.
For best results, use distilled water
Use a big tub as shown to avoid making a mess. Eye protection is advised.
Right photo shows dental water pick turned on to check accelerator pump jet on GL1100 carb body. Look closely at the red arrow and you can see the stream of water exiting the jet.
I find this method especially effective on GL1100 and CBX carbs to check the accelerator circuit outlet nozzles. It’s hard to get a finger over these to check by air alone.
Together, the 2 methods are quite effective. Highly recommended!


Randakk says that ” GL1100, GL1200 and CBX carbs should be done as individual carb bodies “.
I have a 1983 GL1100 and I would like to consider the cleaning IN PAIR WITH THE DECORATIVE STAY IN PLACE for 20 minute in slow boiling water as you suggested to be done ONLY for the GL1000.
So…why not the same procedure for the GL1100 as well?
Thank you
What if you do have an ultrasonic cleaner that your carb parts will fit into. How do you take advantage of using it without doing any damage to the felts or shafts etc?
Yes. Ultrasonic cleaning is safe and very effective.
What type of liquids should I avoid using in the ultrasonic cleaner to not damage any sensitive parts? Thanks.
Follow manufacturer’s recommendation for carb cleaning.
Campbell Hausfeld sells a blow gun for their compressors that is handy for working on carbs. The tip unscrews and you can screw in an inflating needle to act as a tiny air nozzle for blowing out passages & jets.
I’ve only been in industry about a decade now but I thought I’d drop in a recommendation of a product. An outboard technician that works a few bays down from me recommended Mercury Powertune to me and I’ve grown quite fond of it. It comes in spray form and is intended as a spray engine decarbonizer but if you spray enough in a floatbowl to dip your removed jets in it does an excellent job. It doesn’t seem to corrode the aluminum or brass like traditional dips do (seems less harsh than the Yamaha dip to me) and still produces good results. I tend to save the liquid to reuse multiple times. I’ve had no such luck out of many other brands of decarbonizers though, the science is beyond me. Probably not as effective as your techniques for restoration but it works really well in a dealer environment and produces great results.
I’ve not tried that product, but I’ve heard a few recommendations such as yours. Thanks.