Check out our GL1100 Carburetor Repair Manual written by Howard Halasz
This Tech Tip is provided courtesy of Howard Halasz – noted early ‘Wing Guru. Howard is a frequent contributor of technical columns and other information to GWRRA’s Wing World Magazine.
Note from Randakk: This information and much more is covered in Howard’s Honda GL1100 Gold Wing Carburetor Repair Guide.
Before you finish reassembly of your carburetors during a rebuild, you need to check the operation of the accelerator pump.
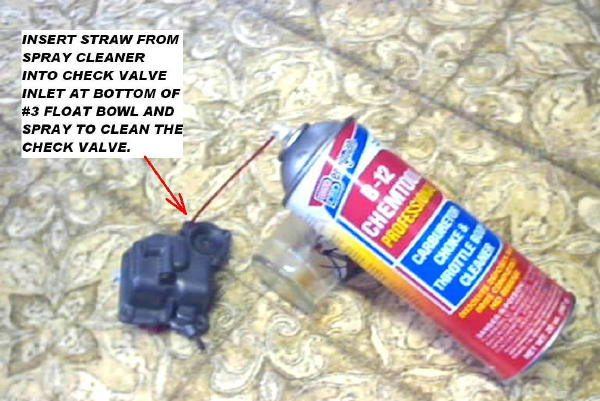
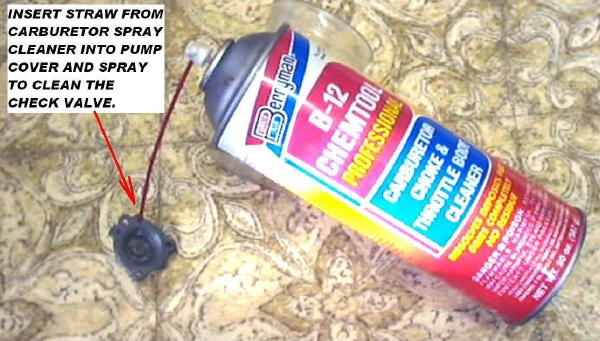
After you have checked the pump nozzles in all four carburetor bodies and proper locations of all fuel seals and the plastic straw is in the right place, you might find out that your accelerator pump is still not working. To remedy a possible problem with the accelerator pump circuit, refer to the photos and text below to clear the accelerator pump check valves.
Purge the #3 Carburetor Float Bowl
Purge the Accelerator Pump Cover
After you purge the check valves, use your Water-Pic® with distilled water to purge any residual carburetor cleaner chemicals from the check valves.
CAUTION: USE THE WATER-PIC® ONLY WHILE YOUR WIFE ISN’T WATCHING! FAILURE TO DO SO COULD LEAD TO POSSIBLE SERIOUS DOMESTIC PROBLEMS!
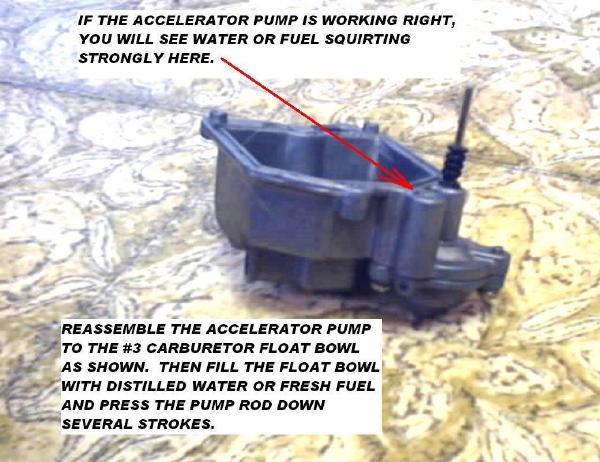
Now reassemble your #3 carburetor float bowl and accelerator pump. First insert the rod end of the diaphragm into the opening in the carburetor float bowl and align the fuel holes in the diaphragm with the fuel holes in the float bowl. Place the spring over the center of the diaphragm. While you compress the spring with the pump cover, install the three screws and hand tighten them.
Now it’s time to test the accelerator pump. Refer to the photo below.
Test the Accelerator Pump
Once you are absolutely sure that the accelerator pump is working properly, you can complete the rebuild process.
Howard Halasz, Wing World Technical Contributor – Houston, TX


so…what to do if it isn’t working properly?