Thanks to Wayne Tucek for suggesting this tip! Early ‘Wings have very robust driveshafts, but they do fail occasionally. The most common failure point is the u-joint on the front of the shaft where it joins the transmission output shaft. The rear splines that join the rear coupler can fail, but that’s very rare.
Honda made numerous running changes during production. Early ’75 models (without the lube zerk near the final drive unit) were somewhat prone to premature failure, but Honda was quick to correct this.
Be aware that u-joint problems don’t linger. They rapidly accelerate to total failure. In additional to stranding you, a failed u-joint can cause major collateral mechanical damage as well as loss of control and crashes. Not something you should ignore
I recommend the following 10-minute inspection as an annual ritual. It’s a good thing to do whenever you do tire or brake work as well.
Inspection procedure:
1. Place the bike on the centerstand
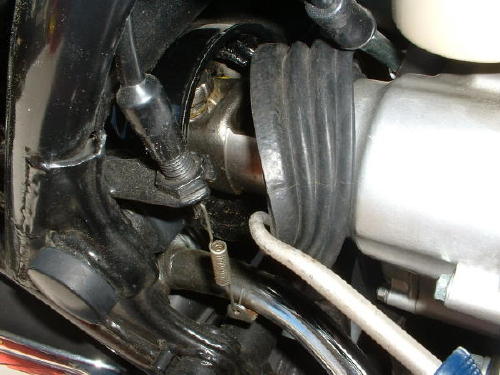
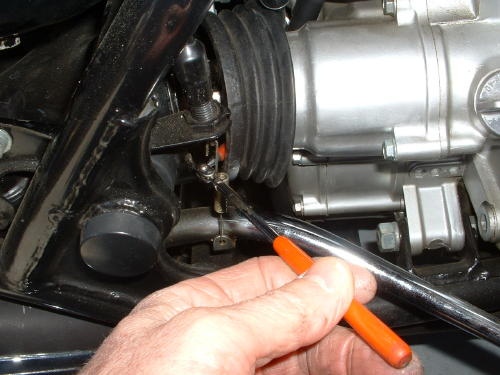
2. Pull the rubber driveshaft boot toward the front of the bike for access to the u-joint.
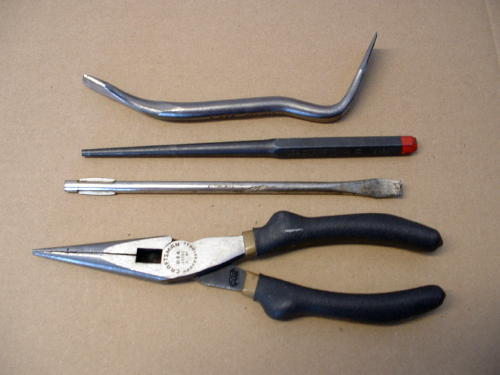
Shown are some boot removal and installation tools. A cotter pin removal tool (above) works very well. An old-fashioned brake adjusting “spoon” works too. In a pinch, a broken and bent flat screwdriver can be pressed into service. Needle-nose pliers and a long drift are useful “persuaders” as well.
3. Turn the rear wheel forward and backward to inspect the u-joint.
4. U-joint problems can usually be seen, felt or heard and are typically obvious. Look for any appreciable “lost motion” or lurching of the joint. You can get fancy and put a dial indicator gauge against the joint to check for abnormal runout, but that’s usually overkill.
5. Important: using a small pocket magnet, check inside the boot for metal particles. If any metal is found there the u-joint is almost certainly going bad! This is the key aspect of this inspection procedure.
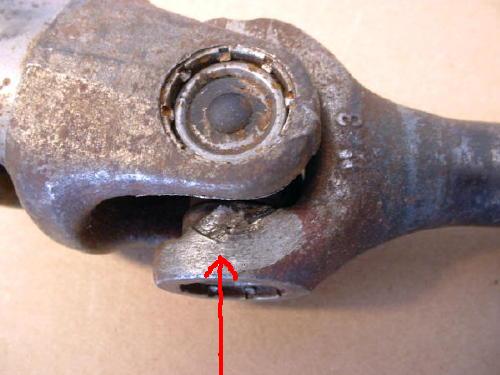
6. Look for smooth, worn shiny spots on the yoke surfaces. This indicates metal to metal contact and joint failure. See the example indicated with the red arrow:
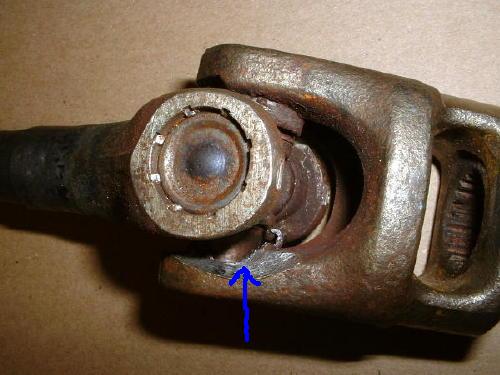
7. Severe failure will reveal gouged areas on the yoke as indicated with the blue arrow:
8. If no problems are detected, reposition the rubber boot taking care not to puncture or tear.
This procedure is easier on a warm day when the rubber boot is more pliable and cooperative.
These driveshafts are designed to be virtually “non-rebuildable,” so replacement is the only viable option. Honda made many “running changes” and sourced these driveshafts from multiple vendors. All the variants are interchangeable. This final part number (now discontinued) supersedes several prior versions: 40200-431-671
Do you by any chance know the size of the circlip
Hans,
Thanks for reaching out.
It is 20mm (Honda part #94510-20000).
Anyone know how much grease should get pumped into the zerk on the later models? I’ve seen something in my Clymer manual about 90 grams of Moly NLGI 2 grease. 90 grams is about 3 oz. and seems like a lot.
I’M RESTORING A 1975 GL1000. MY QUESTION IS HOW AND WHERE EXACTLY DO I INSTALL A ZERK FITTING FOR THE SHAFT? I’VE NOT BEEN ABLE TO PHYSICALLY SEE ONE TO TAKE MEASURMENTS. THANKS IN ADVANCE!
Dear Sir!
My engine is faulty. My rear drive knocks when I start or when the load is heavier. When the engine reaches operating temperature, it is difficult to start because something seems to be jerking around the drive shaft !!
What could be the problem? Thanks for the reply!
Sincerely, László Kanyuk
Great information. Lucky me I came across your site by accident (stumbleupon).
I have saved as a favorite for later!
Hej med jer
Jeg har en gl 1000 fra77. Jeg har problemer med slask i akslen der går ud fra gearkassen, jeg kan dreje den ca.1/6 del omgang når den står i gear. Kan du fortælle mig hvad problemet er.
På forhånd tak
Søren Madsen
Danmark
Hi just wondering, will the 79 gl1000 drive coupling fit the 75 gl1000 ?
Cheers Carl
Yes.
I’m putting my final drive unit back together after restoring the swingarm via powder coating. The manual calls for a multipurpose grease NLGI #2. I’m looking at using a 100% synthetic bearing grease from Mobile 1 that is NLGI. With this be an improvement or a detriment to the splines in the final drive unit and the swingarm bushings?
That grease will be fine. “Moly” was the preferred grease in the 70’s, but modern lubes are improved and fine.
My driveshaft’s u-joint recently failed catastrophically. I’ve received a new one, and am ready to commence installation.
1. What collateral damage should I inspect for after a catastrophic failure?
2. My new driveshaft got a little dirty in transit, is it advisable to clean it (hydrosonic) and relubricate the u-joint?
Check for shrapnel with a magnet and clean the swing-arm (driveshaft out). I would not do anything heroic to clean the new driveshaft …certainly do not immerse it! The front-joint is “sealed,” but you will want to lubricate the aft end coupler where it mates to the final drive with moly grease.
Again, I appreciate your forthcoming attitude and your excellent info.
Can you tell me if the drive shaft and coupler from a gl1100 will fit a gl1000?
Sorry. The GL1100 driveshaft will not fit the GL1000.
Is there a way to remove the gl1000 u joint? I want to put a ’82 gl1100 swingarm on my ’79 gl1000 and i am told you have to put the gl1000 u-joint on the gl1100 shaft. just wondering if swapping the u-joint can be done without a special tool.
thanks
Sorry. These u-joints are integrated with the driveshaft and are not designed to be rebuildable or disassembled. A good driveshaft specialist (most large cities have such a firm) can modify the overall length or swap the splined end for you depending on your needs.