Early ‘Wings have very reliable clutches that last a long time. I did upgrade the clutch in RC-003 ….one of many upgrades necessary to handle the increased output of the supercharger.
1. Friction Disk Set: #HPK-18 (includes 9 disks…only 8 are used)
2. Disk Clutch Plate Set (6): #401-35-078024 (same as old Barnett number #HP-24-20)
3. Heavy Duty Spring set (6): #MT-15-6
4. OEM damper plate retained in center position
5. New Honda clutch cover gasket: #1193-371-306
6. New Honda clutch shaft oil seal: #91202-KFL-841
7. ’77 clutch lever, ’77 clutch perch and ’77 left handlebar switch (extra leverage of longer lever reduces clutch lever effort)
Since I had not done a clutch job in a while, I referred to Octane’s remarkably useful Tech Tip to refresh my memory (much better than any manual):
“The NGW Project Bike. Clutch renewal. Engine in frame.”: https://www.ngwclub.com/forum/viewtopic.php?t=6905
Lars wrote a terrific tutorial on how to perform this work!
One of the details Lars mentions during finally reassembly is:
“Now for some reason (that I can’t recall now) I couldn’t get in the whole package (plates AND clutch center) so I had to first insert the plates AND THEN the center after aligning the tangs … and after a LOT of fiddling I got the center in.”
Here’s the method I use to make that detail a bit easier:
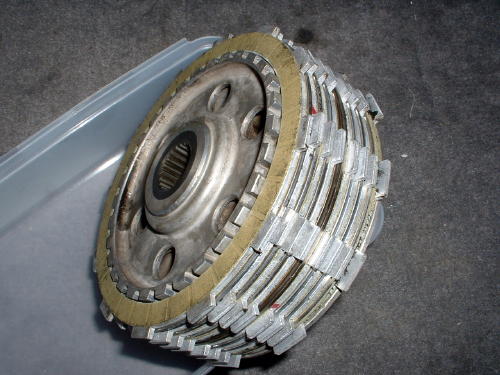
Build the whole stack onto the clutch center after pre-soaking the friction disks in motor oil for 10 minutes. Note: these disks are shown “dry”….to keep oil off my fingers and camera!

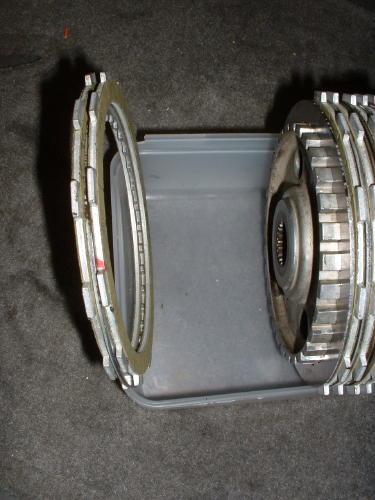
Next, separate the forwardmost 2 friction disks and 1 clutch plate:

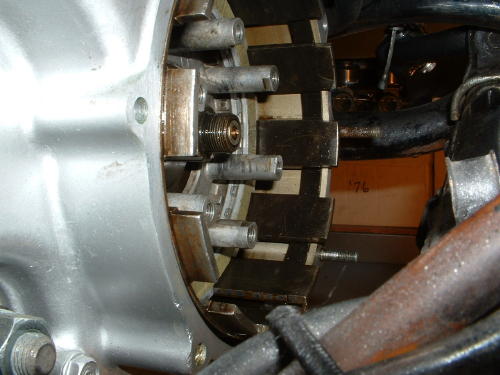
With the inner pressure plate in it’s correct postion, now insert these (2) friction disks sandwiching (1) clutch plate into the clutch basket as shown:

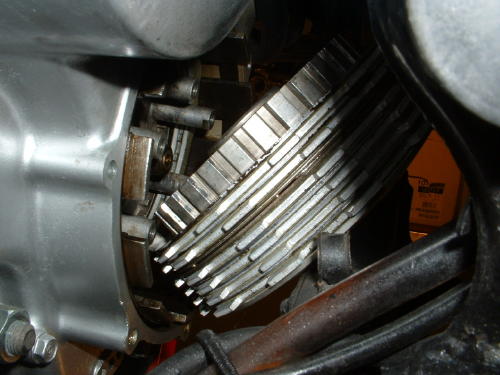
With everything centered, you now have enough clearance to maneuver the remainder of the entire clutch pack into position in one operation with minimal wiggling!

As Lar’s points out, be certain the clutch pack is “flush with the edge of the ‘outer drum’ edge.”
The rest is easy…just complete the steps as Lars lays them out!
Leave a Reply