Bleeding the brakes on a GL1000 is straightforward and well-covered in any manual. However, this can be a most aggravating task. Below are some tips to reduce your frustration.
Precautions:
1. If you have any problems with less than perfectly bled brakes, take immediate and comprehensive steps to rectify this ASAP. Do not ride your bike with anything less than brakes which are operating absolutely perfectly.
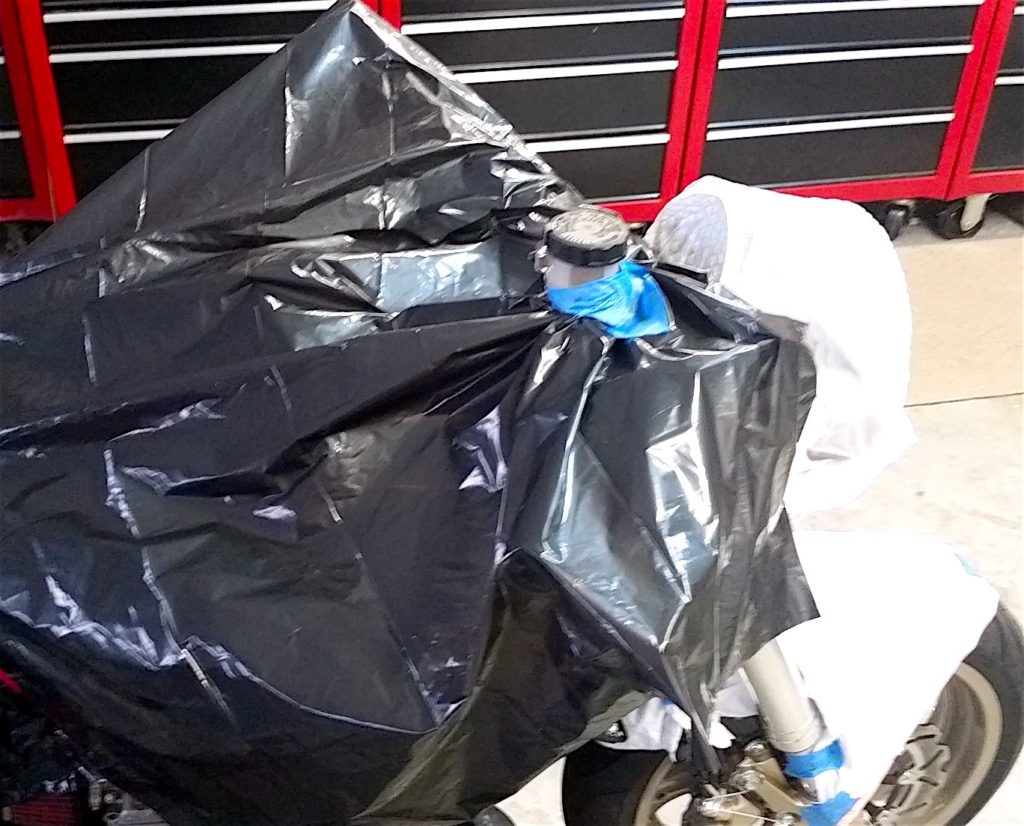
2. Keep in mind that brake fluid is a VERY effective paint remover, so take adequate steps to protect your paint whenever you do any brake work. When I’m bleeding brakes, I take time to cover the bike carefully with plastic. I use large plastic leaf bags. I also keep a spray bottle of soapy water and another spray bottle of plain water handy just in case a spill occurs. Rapid application of soapy water following by lots of rinsing will prevent paint damage should a spill occur.
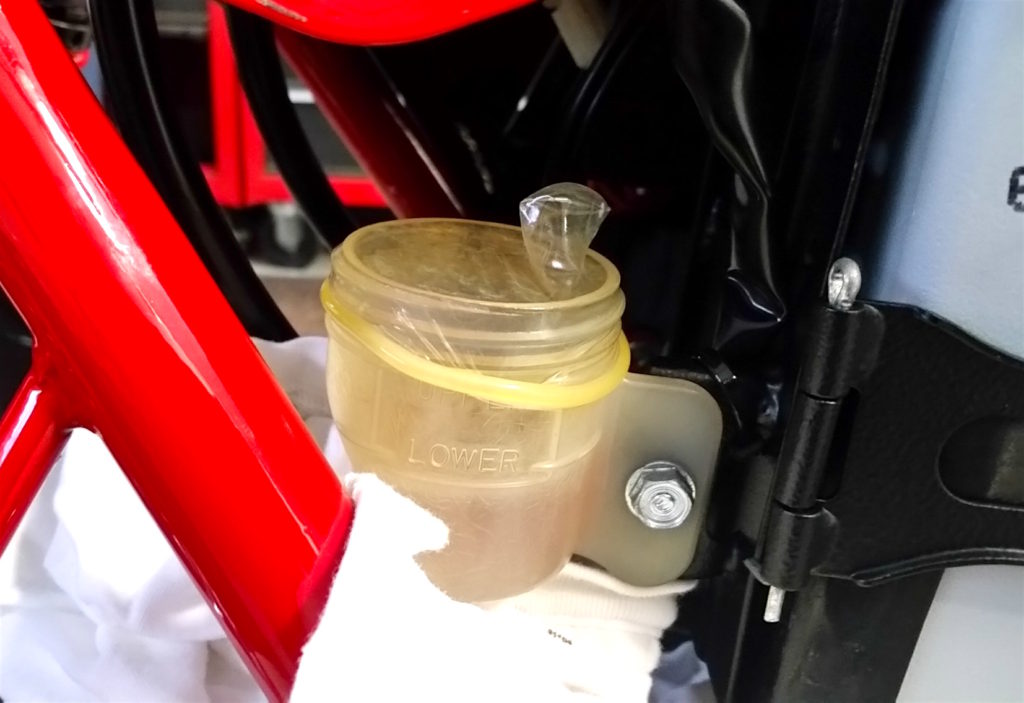
3. Make sure you have sufficient time allotted to do the entire job without interruption. The goal: minimize the time new brake fluid is exposed to air!
There are 3 major problems you might encounter:
• “Mushy” lever
• “Leaky” lever
• “Hard lever with too much travel”
Note: In this tech tip, “lever” generally means both lever (front) and pedal (rear).
“Mushy” lever indicates the need to bleed more thoroughly or replace brake lines which have lost their structural resistance to expansion. You may also have a “trapped” air bubble at a banjo fitting or other high point in the system.
“Leaky” lever provides a firm initial brake feel that deteriorates quickly; i.e., the lever slowly pulls all the way the handlebar grip. This indicates an external leak in the hydraulic system which is easy to diagnose (there will be a puddle or drip somewhere) or an internal leak past the seals on the master piston inside the master cylinder. IMMEDIATE REPAIR IS NECESSARY!
“Hard lever with too much travel” is a fairly common issue with early GLs but rarely mentioned in Troubleshooting Charts. The soft alloy of the front brake lever itself can wear on the engagement “face” which contacts the actuating rod of the master cylinder to the point that the geometry is compromised. The solution is easy …replace the brake lever. See also this odd front brake lever problem.
Brake Fluid Service Frequency
It’s a best practice to flush and replace brake build every Spring before the riding season. If you do this religiously, you will rarely have issues with calipers or master cylinders. This is especially important if your bike is stored in an unheated garage (or outside) during the Winter. If you can, pick a low humidity day for this project.
Bleeding Methods:
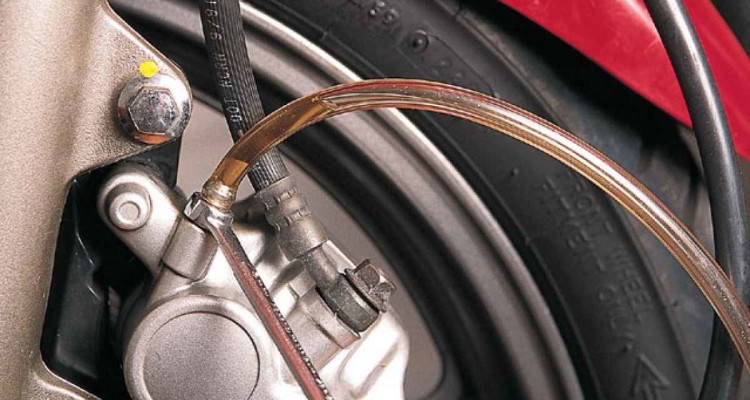
“Old Reliable” – I usually bleed brakes the old fashioned way … with a simple catch container and a suitable length of clear tubing. This is all you need really. My catch container is “dedicated” to brake bleeding, so there’s not much setup or cleaning required for each use. It actually started life as a toddler’s “sippy” bottle (really!). I’ve modified it a bit to meet my needs …mainly by adding weight to the bottom to make it tip-resistant.
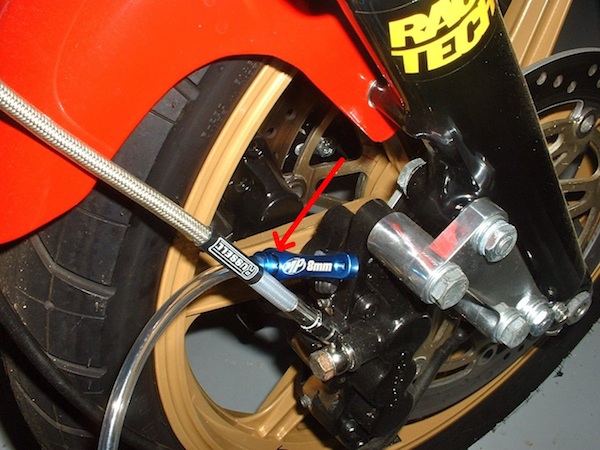
Recently I’ve added Motion Pro’s great Mini Bleeder to my arsenal of tools. This is a fabulous tool that combines a special seal, one-way check valve and a captive multi-positional wrench to make traditional brake bleeding a non-mess, blissful experience!
Motion Pro’s “Mini Bleeder” (Part #08-0482) – available here. Highly Recommended!
(Most Vintage Honda’s use the 8mm version shown. 10mm, 11mm and 3/8″ tools are available to fit other machines.)
Vacuum Bleeding – I also have a Mity-Vac system which works great. I find that vacuum bleeding provides no real advantage and takes me longer to setup and clean when I’m done. Thorough cleaning is an absolute must with a Mity-Vac or similar since vacuum pumps are used for many other purposes besides brake bleeding. Mity-Vacs usually come with a “motorcycle brake bleeding” supplement in the manual plus adapters specifically designed and sized for motorcycle brake bleed nipples.
Reverse Bleeding – Some people reverse bleed by adding fluid through the bleed nipple at the caliper with a large syringe or pump-type oil can. I have a simple setup for this that works very well .. a jumbo syringe from a medical supply house. You can also purchase these from vet-supply dealers that cater to large animals. I don’t usually find reverse bleeding necessary unless every component in the system is “dry.” Reverse bleeding can be very effective for stubborn cases of trapped air bubbles. Since air bubbles naturally want to rise, reverse bleeding easily moves the air upward to the master cylinder reservoir. Also, when attempting to fill and bleed a completely “dry” braking system, reverse bleeding can save time and aggravation. However, reverse bleeding is a bit riskier in terms of creating an opportunity for spills and ruined paint since you’re pushing fluid up to the master cylinder reservoir. If you’re not paying attention to the level in the reservoir, fluid can easily overflow with dire consequences.
Bleeding Tips:
When bleeding, keep these points in mind:
- Always use the correct, fresh brake fluid from an unopened container.
- Remove the old fluid from the reservoirs with a syringe.
- It helps to “pre-fill” the calipers, master, and lines as you re-assemble the components after an overhaul.
- Move the lever (or pedal) deliberately…don’t thrash! You’re trying to move fresh fluid in a manner that displaces the fluid and air froth already in the system. If your action on the lever (or pedal) is too aggressive, you risk creating more froth in the system.
- When moving the lever (or pedal), stop about ½” short of max travel on each stroke.
- Put some grease on the bleed nipples to prevent air entry when the bleed nipples are cracked open (especially important when vacuum bleeding)
- Open the bleed nipple on each stroke just as you begin moving the lever (or pedal).
- Very important: open the bleed nipple just enough to let a very small amount of fluid pass through. If you open the bleed nipple too much, you will lose “feel” at the lever (or pedal) and you’ll have a harder time stopping at the right moment on each stroke.
- Close the bleed nipple at the end of each stroke before you release the lever (or pedal).
- It’s sometimes necessary to “burp” the banjo fittings to release trapped air.
- Judicious tapping with a suitable rubber mallet at suspected locations of trapped air is sometimes helpful in getting them to move.
- If you have a highly aerated (frothy) mixture in your system, sometimes it helps to put pressure on the fluid by squeezing the lever (or pedal) overnight. For the lever, I use a zip-tie and for the pedal, I use a 5 pound dumbbell hanging from the end of the pedal. Unfortunately, the benefits of the “overnight squeeze” method are greatly over-stated by some as a “cure-all.” I can say flatly that this “cure” is a myth. But this method will temporarily firm up your lever mainly by overcoming the caliper seal – to – caliper piston relational “memory” which will temporarily move the piston closer to the rotor giving a temporary increase (useful) in available lever. If you have froth, it can also help by putting some of the air back into suspension with the brake fluid. Then, you will need re-bleed again the next day to replace the air-contaminated fluid in the system. Otherwise, the lever firmness you gained overnight will gradually be lost …trust me it will!
- Make sure the by-pass port in your master cylinder is open and clear. This port is the smaller of the 2 ports which allow fluid to travel from the reservoir into the cylinder. This small orifice is easily blocked by small amounts of crud. If this small port is blocked, you’ll have all sorts of brake problems including difficulty bleeding the system. You must remove the reservoir to inspect and clean these very important ports.
Brake Fluid Compatibility Issues:
- DON’T MIX DIFFERENT TYPES OF BRAKE FLUID WILLY-NILLY! GL1000s (and most vintage Hondas) specify DOT3 brake fluid. I have used Castrol brand brake DOT3 fluid for many years with great results. But, “straight” DOT3 brake fluid is getting rather hard to find. Mostly you will find DOT3/DOT4 combination formulations which are fine. These are supposed to be compatible with both DOT3 and DOT4. It’s always safe to mix DOT4 into a DOT3 system.
- Brake fluid types can be confusing. For example, DOT5.1 is marketed as “universal” brake fluid and is supposed to be compatible with DOT3 and DOT4. However, DOT5 brake fluid is silicon-based and not compatible with any other type of brake fluid. Be safe and don’t confuse the next owner of you bike or your mechanic. Use DOT3/4 brake fluid in your vintage Honda!
- Per Mike Nixon: “D.O.T. 3 brake fluid is for all practical purposes obsolete. D.O.T. 4, a rating that came about in response to the emergence of sintered metal brake pads during the early 1980s, has replaced it, being still a glycol fluid but with a slightly higher boiling point. Glycol brake fluid containers now are labeled “D.O.T. 3/4,” presumably to eliminate confusion, as the two fluids are nearly the same. However, this seems to have merely raised more questions in most people’s minds. The short of it is, if using purely organic (almost exclusively aftermarket, and usually, racing) brake pads, D.O.T. 3 will suffice. Otherwise, use D.O.T. 4.”
- Avoid DOT5 brake fluid! More from Mike Nixon: “On the practical side, beware that glycol (DOT3/4/5.1) and silicone ( DOT5) brake fluids are hugely incompatible with each other. Mixing even small amounts will create a sludge that looks amazingly like Italian salad dressing and is about as effective as a brake fluid — meaning, not. Of further consideration is that, in some cases, the hardware designed for one fluid will not accept the other. Brake caliper and master cylinder seals, hoses, and other parts won’t always work correctly when the type of fluid is changed.”
- Brake fluid is hygroscopic (attracts water). This has two implications. Over time, the water absorbed by brake fluid will effectively lower the boiling point of your fluid rendering it less effective under hard use. Secondly, the absorbed water wreaks havoc on calipers and brake pistons causing rust and pitting. If you don’t change your brake fluid regularly, eventually your brakes will fail …it’s a certainty!
I recommend that you change brake fluid every year religiously. Here’s an excellent article discussing the finer points of brake fluid compatibility issues: click here.
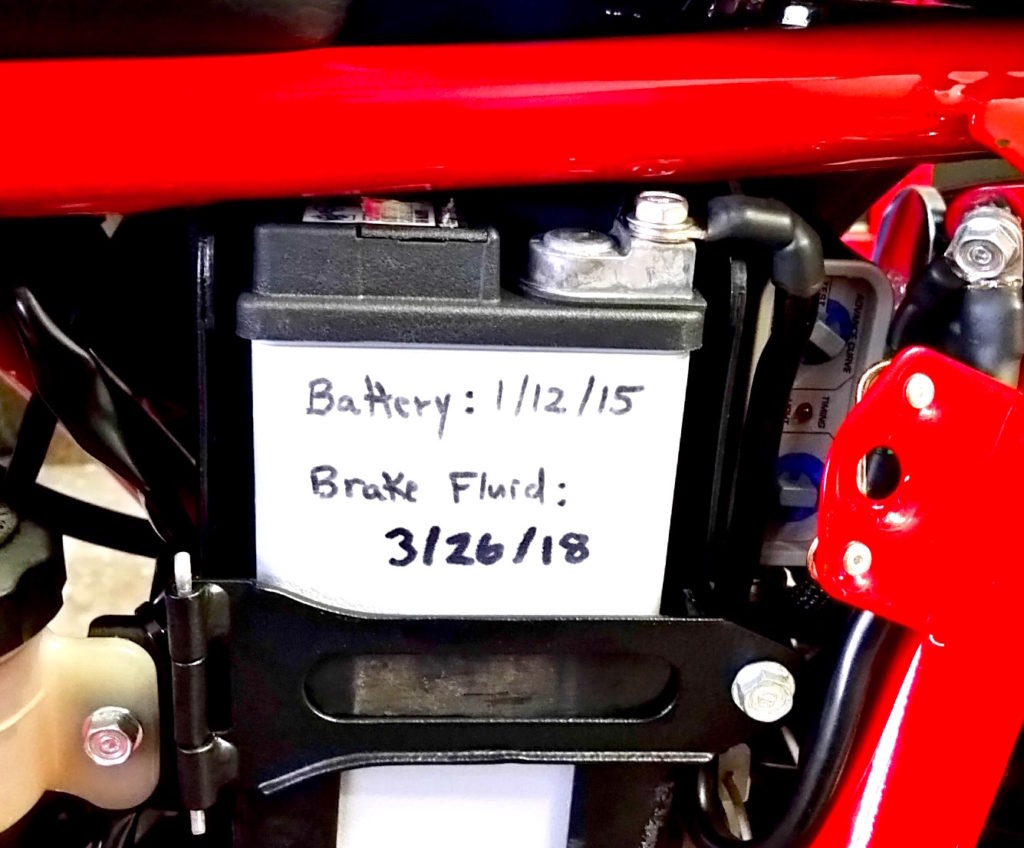
Finally, document your brake fluid change. Here’s Randakk’s method:
—
If you want to find the best selection online for motorcycle parts, visit our stores below:
www.DimeCityCycles.com | www.Z1Enterprises.com | www.Randakks.com | www.MikesXS.net



I am told in instructions for new brake upgraded lever and master cylinder that I must use dot4 with polyglycol ether used fluid
have found motul dot 5 with polyalkaline glycol ethrers. will this pass mmuster ?
please email me direct at. glltd@shaw.ca. with comments . thx
im reading this brake upgrade is only good for a single front disc bike _ say what ? no good fo my gl1000 ?
good afternnon,
it has been 3 months since I replaced the rubber brake lines on my 1980 Honda GL1100. Also replaced , brake pads , and new master cylinder for the front brake. it was original and cracked.
I have given up… still spongy brake level, pulls all the way to the bar,
I have done the reveres bleed, the standard bleed procedure, vacuumed bleed. , used the professional Vacuum bleed container, and the master tech too, and have gone through 3 full litres of fluid , on the just the front brakes. I have tapped the hoses and the banjo joints , I have twisted the joiner ( where the two front line separate), no solid brake lever. NO leaks anywhere,
I had to move the bike off the lift and it did not stop , until I hit the shift lever and got it in gear .
HELP now the season is over , and still no brakes…… buy the way , your carb kit is great , thats why I went with your recommended stainless brake line kit.
i don’t want to waste another season.